
If access to the turn signal bulb is easy, this is a quick, inexpensive repair. If the bulb is buried behind liners or a bumper cover, labor (not parts) can be higher and increase the total bill.
If you want a local, per-vehicle estimate, you can check live quotes in the Jerry app.
Real customers Jerry has helped
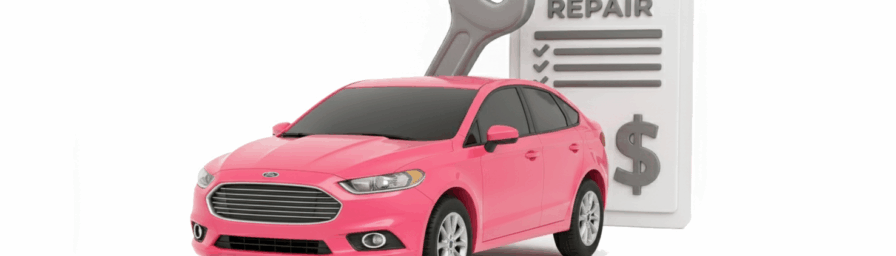
Costs for replacing a turn signal bulb depend on your exact vehicle, where you live and the parts used. With Jerry, you can quickly see what drivers are paying right now. Below are real examples of customers we’ve helped secure top prices for their turn signal bulbs.
|
Date
|
Customer name
|
Car
|
Location
|
Part cost
|
Labor cost
|
Total cost
|
|---|---|---|---|---|---|---|
| 07/20/26 | Sara B. | 2015 Honda Accord | Houston, TX | $9.92 | $39.41 | $49.33 |
| 07/20/26 | Linnie W. | 2009 Toyota Highlander | Douglas, GA | $9.20 | $50.27 | $59.47 |
| 07/20/26 | Julian S. | 2013 Volkswagen Jetta | Baytown, TX | $13.94 | $54.51 | $68.44 |
| 07/20/26 | Julian M. | 2009 GMC Yukon | Wichita, KS | $13.13 | $39.48 | $52.61 |
| 07/20/26 | Gerald H. | 2002 Toyota Camry | Newark, OH | $9.02 | $41.58 | $50.59 |
| 07/20/26 | Mike T. | 2009 Volvo XC90 | Fort Lauderdale, FL | $8.19 | $33.84 | $42.03 |
| 07/20/26 | Jessie K. | 2005 Jeep Grand Cherokee | Winona, MN | $9.11 | $34.76 | $43.87 |
What drives the cost
Think of this job as a cheap part plus time to reach it:
- Access path — When you can reach the socket through a trunk/hood panel, it’s a 10–15-minute job. Expect ~0.5–0.8 hours of labor if you have to pull a fender liner, while a partial bumper removal can run 1–2 hours.
- Vehicle packaging — Compacts and crossovers often tuck lamp housings deep in corners, meaning more fasteners, clips and careful prying. Time adds up even though the bulb hasn’t changed.
- Shop type & labor rate — Independents usually bill less per hour than dealerships.
- Bulb choice — Standard, amber-coated, dual-filament or long-life versions vary a few dollars each; the price impact is small next to labor but matters for DIY.
- Add-ons while you’re in there — If the bumper or lamp housing is out, some owners replace the other side or adjacent bulbs (parking/low-beam) to avoid paying labor twice later.
Twenty minutes of careful prying later—plus one stripped bolt and a few choice words—and I finally got the housing off. The fix itself was a $6 bulb and minimal labor thanks to an access panel, but no service guide accounts for the extra time for collision damage—or an impatient customer. The takeaway is that hidden/body damage adds time. Estimates are based on “textbook” cars and yours might not be one.

Pro tip: Clean with electrical contact cleaner and apply dielectric grease on reassembly to fight moisture. If you see water tracks, plan on a taillamp gasket — a cheap fix that prevents repeat failures.
What is a turn signal bulb?
A turn signal bulb is the light that flashes when you use your indicator to show a lane change or turn. It’s mounted in the front and rear light assemblies (and sometimes in the mirrors) and typically shines amber so other drivers instantly recognize your intent. That blinking is controlled by the car’s electronics, which pulse the bulb on and off at a steady rate to make the signal easy to notice.
Most cars use one of two types: traditional incandescent bulbs or newer LEDs. Incandescents are simple and cheap but burn out over time; LEDs last longer and light up faster, but they may need vehicle-specific parts to work correctly. Either way, a healthy turn signal is a small part with a big safety job—clearly communicating your next move to everyone around you.
Your action plan: Getting this repair done right
Confirm the symptom: Check the dash indicator and outside lights; fast blinking (hyperflash) or no blink usually means a bad bulb. Customers use the Jerry app to help them diagnose with confidence before taking their car to the shop
Note the side & location: Front, rear, or mirror? Snap a quick photo to show the shop.
Look up the bulb type: Your owner’s manual or parts counter can identify the exact part number.
Decide shop vs. DIY: Most drivers are quickest at a shop—many do this same-day with no appointment.
Consider replacing both sides: Saves a second visit when bulbs are the same age or access is tough.
Request a socket check: Have the tech inspect for corrosion, burned contacts, or water leaks; ask for dielectric grease on reassembly.
Test before you leave: Left/right signals and hazards, front and rear.
Keep the receipt: Useful for “fix-it” ticket proof and for tracking part numbers.
DIY vs. Pro: Can I do this myself?
If you’re comfortable with light trim work and have basic tools, DIY can be fast and cheap — provided access is reasonable. If your car needs liner or bumper removal, weigh aspects like time, tool cost and the risk of cracked clips. Whether you do it yourself or leave it to a pro, Jerry gives customers the price transparency to go into the repair with confidence.
Tools you might need
- Phillips/flat screwdrivers; 8–10 mm socket set
- Panel poppers/trim tools (a $20 kit saves frustration)
- Jack & stands (for fender liner access)
- Flashlight/inspection mirror
- Gloves (avoid touching bulb glass)
Pro access tips
- Turn the steering wheel full-lock to open up liner access; often just the rear half needs to come out.
- Warm plastic in the sun or with a garage heater to reduce brittle-clip breakage. Keep a small assortment of push-clips on hand.
- If a headlamp must come out, mark the aim screws before removal to avoid misaim complaints on reassembly.
- Load resistors get hot, so bolt to metal away from harnesses.
WHAT JERRY’S CUSTOMERS ARE ASKING
-
Can I drive with a burned-out turn signal?
-
Why is my turn signal flashing fast?
-
Should I replace both bulbs at the same time?
-
What if the new bulb keeps burning out?

Jerel Lawrence is an experienced and certified automotive technician with a strong foundation in diagnostics, repair and technical mentorship. A graduate of NASCAR Technical Institute in 2010, Jerel began his career at national automotive repair chain locations, where he earned eight certifications from the National Institute for Automotive Service Excellence (ASE).
From 2017 to 2022, he worked as a General Motors-certified technician at a Cadillac dealership, refining his skills in manufacturer-specific diagnostics and service procedures. Today, Jerel leads as the senior technician and mentor at a family-owned repair facility, where he helps guide the next generation of technicians while ensuring top-quality service.
In addition to hands-on work, Jerel contributes to the automotive community through writing detailed articles and answering technical questions to help vehicle owners better understand and care for their cars.

Everett Cook is an award-winning journalist and editor with more than 10 years of experience across a variety of industries. In editing for Jerry, Everett’s mission is to help readers have a better understanding of the costs of owning or leasing a car and to better understand their vehicle in terms of insurance and repairs. Prior to joining Jerry, Everett was an editor for Axios. His previous work has been featured in The New York Times, The Los Angeles Times, The San Francisco Chronicle, The Atlantic, Atlantic Re:think, The Boston Globe, USA Today, and others. He’s also been a freelance writer and editor with experience in SEO, audience building, and long-term content roadmaps. Everett is a proud graduate of the University of Michigan.